Tuesday 9 December 2014

The Buzzphrase Generator -Javascript

The Buzzphrase Generator

This buzzphrase generator is still in development and is for savvy management and sales people to use to bamboozle potential clients

The Buzzphrase

Thursday 4 December 2014

Ubuntu 14.04 LTS Installation Guide for Chromebook C720

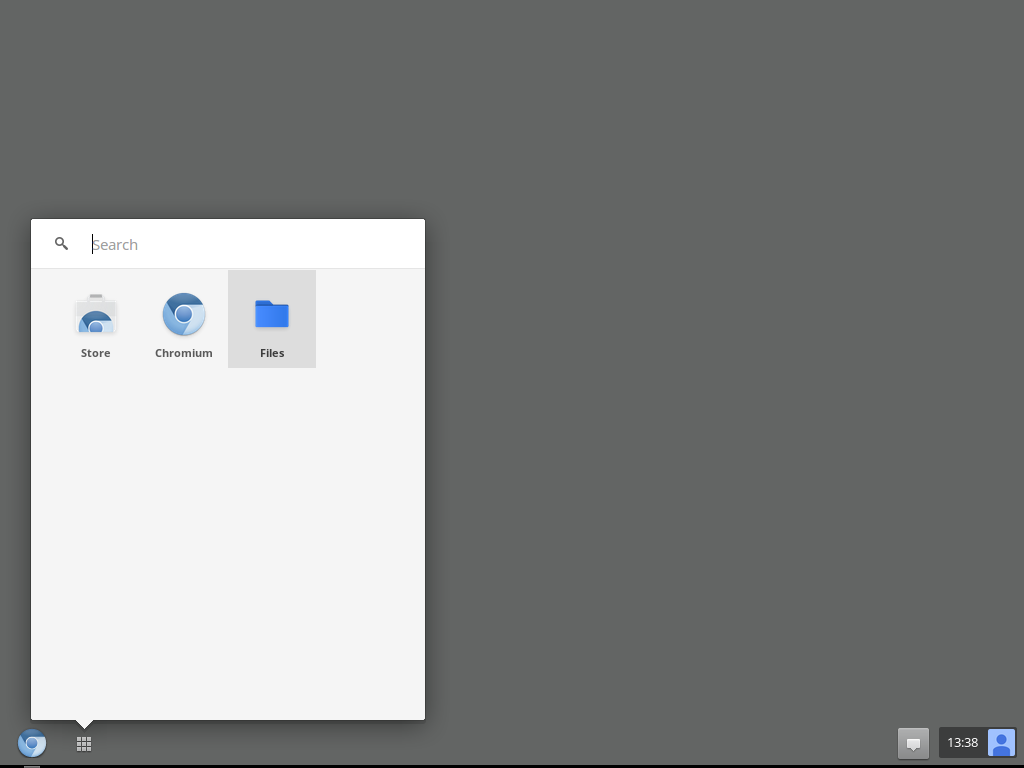
Installing Ubuntu on an Acer Chromebook is a great way to gain more control over your laptop and run some custom software in an unrestricted environment. Fortunately it is possible to switch out ChromeOS entirely for Ubuntu which, in my own opinion makes for a great personal operating system to use.

Installation Guide

  1. Firstly, review the hardware required for this guide.
  2. Next you will want to create a recovery disk
  3. Now that you have your recovery disk, proceed to enable developer mode
  4. At this stage, if you've already experimented and have chrubuntu, there's a good chance you don't have the space to download and install a linux distribution. follow the recovery guide to restore your chromebook to default. If you need to do this you will need to enable developer mode after you have followed the recovery guide.
  5. Once developer mode is enabled you can proceed to download your preferred version of Ubuntu
  6. Once you have downloaded your preferred version of Ubuntu you will need to prepare a USB disk to make it into an Ubuntu Installation disk. You can do this by following the Ubuntu USB preparation guide

Hardware Required

  • 1 x 4GiB+ or greater USB Thumb Drive or SD Memory Card for creating a Chrome recovery USB
  • 1 x 2GiB or greater Memory Card for creating an Ubuntu installation media disk

Software Requirements

Below are various distributions of Ubuntu that have been customized by a gentelman named Hugh Greenburg for use specifically on the Acer C720 Chromebook. Any of these you wish to install on your chromebook, personally I'm partial to Xubuntu as the desktop environment XFCE (XFACE as I like to call it) looks fantastic and is very fast and lightweight.

The full list of available Ubuntu and a few other variants of linux are listed at distroshare however the most commonly used ones I have listed below

Chromebook Recovery USB Preparation


First up, we're going to want a way to get your chromebook up and running if there is a catastrophic failure.
  1. Load ChromeOS as you normally would and login.
  2. Once your chromebook is logged in, get the Chromebook Recovery Utility provided free of charge by google.
  3. Install the Chromebook Recovery Utility as an App in Chrome
  4. Launch the newly installed Recovery Utility from chrome apps, click on Get Started


  5. On the next screen choose 'Select a model from a list'


  6. Choose Acer and Acer Chromebook C720 as this is your model.
  7. On the next screen you will be asked to insert your USB or SD card, Insert the 4GiB (or bigger) USB Thumbdrive or SD Memory card into the appropriate port on your chromebook. Wait approximately 30 seconds to give ChromeOS time to recognise and automatically mount your memory stick so that it is available to the Recovery Utility, in practice the Recovery Utility should detect that you have inserted the USB stick within a few seconds.


  8. In the example above you can see that it has detected a 7.7GB flash drive. Select Continue.


  9. You will be presented with this screen. This is your last opportunity to save the files from the memory stick elsewhere, such as googledrive for safe keeping. Once you click 'Create now' the memory stick will be erased and the ChromeOS restore image written onto the stick. Once you are happy to proceed, click 'Create now'


  10. Once the process has completed choose 'Done'

Enable Developer Mode

The purpose of this section is to set up your Chromebook to boot into Developer Mode so that access to the underlying Linux distribution can be gained. Once access to the underlying operating system is gained ChromeOS can be modified and we can proceed to obliterate any remnants of ChromeOS on the Chromebook

  1. Boot into recovery mode
  2. Press and hold the Ctrl key and press d
  3. Allow your chromebook to restart, it will inform you OS Verification is off.
  4. Press and hold the Ctrl key and press d
  5. ChromeOS will inform you it is preparing system for Developer Mode. This may take some time so be patient

Enable Recovery Mode

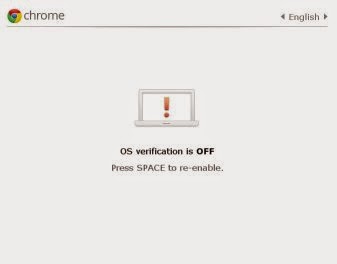
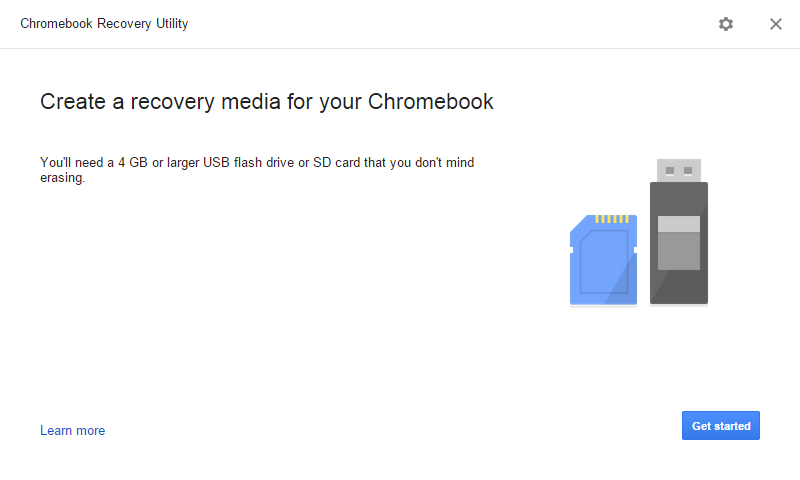
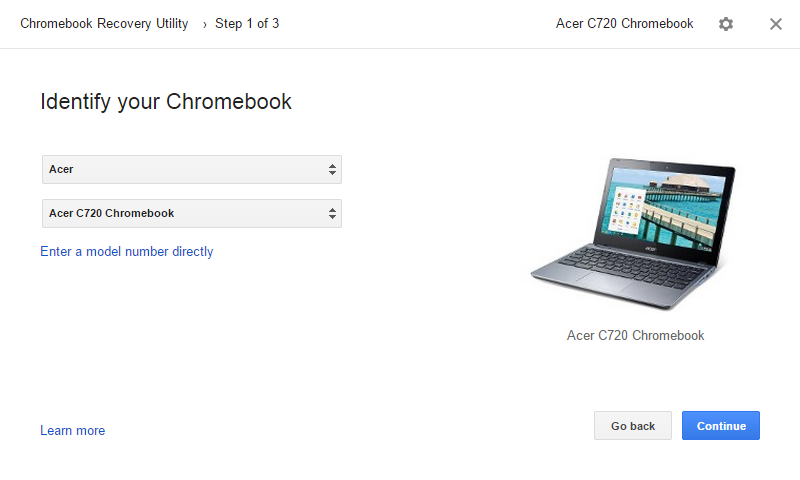
This section describes how to boot into recovery mode. Recovery mode can be used to restore your chromebook to factory defaults using a recovery disk

Recovery mode is also used to enable Developer mode.

  • Make sure you Chromebook is powered on, if it isn't already then proceed to power it on and log in as usual
  • Once logged in press and hold the Esc and Refresh keys and whilst holding them down press the power button
  • The Chromebook will restart and inform you that Chrome OS is missing or damaged. Don't worry it isn't, this is a standard message and this is Recovery Mode
  • Enable Legacy Bios & USB Booting

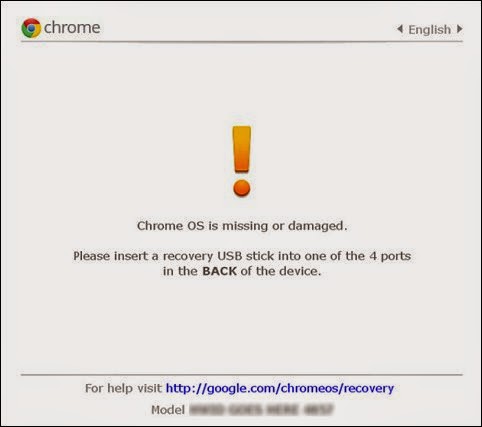
    If you have not already, you will need to follow the steps to enable developer mode and then proceed to perform the following instructions

    1. Make sure that your Chromebook is switched off, then power it on
    2. Once you reach the login screen, log in to Chromeos as normal
    3. When you have logged in, press and hold the Ctrl key and Alt key at the same time and press the t key whilst still holding down ctrl and alt
    4. The Window that pops up is the ChromeOS Shell - Chrosh for short, clever huh? Type shell and press return
    5. Switch to an elevated BASH shell by entering the command sudo su. This command switches the user to the chronos account in the shell, by default there is no password for the chronos account. Please take care to enter commands correctly in this prompt as you can seriously damage the operating system - fortunately for us we have a restore disk created earlier should any mistakes be made. If you have not prepared one please proceed to prepare a Recovery Disk
    6. Type or paste the following command without the quotes "crossystem dev_boot_usb=1 dev_boot_legacy=1" and press return. This command puts your Chromebook into a Legacy BIOS mode and also allows it to boot from USB media
    7. Close Chrome
    8. Restart your Chromebook and Legacy BIOS and USB booting will be enabled

    Ubuntu USB Preparation Guide

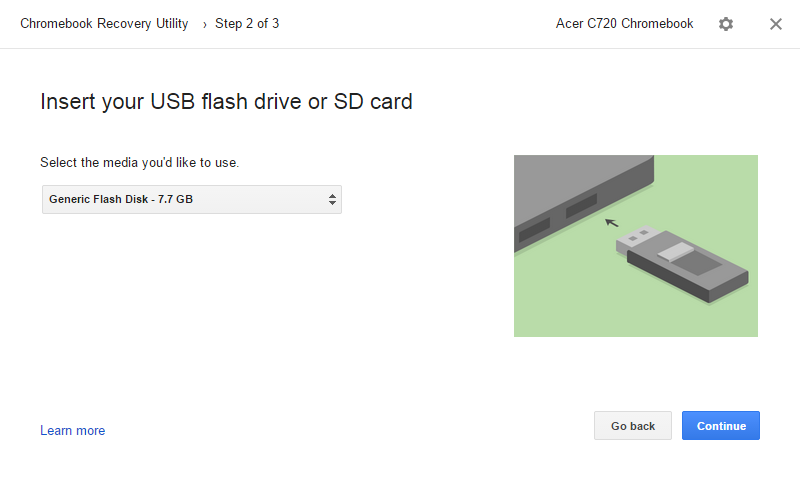
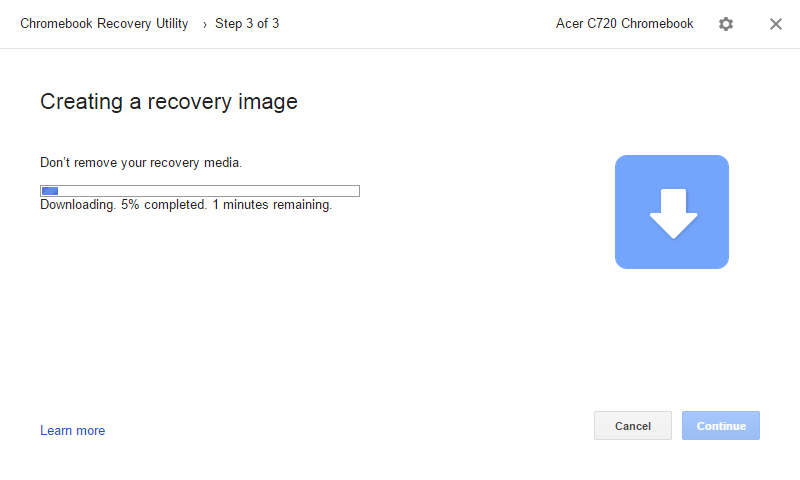
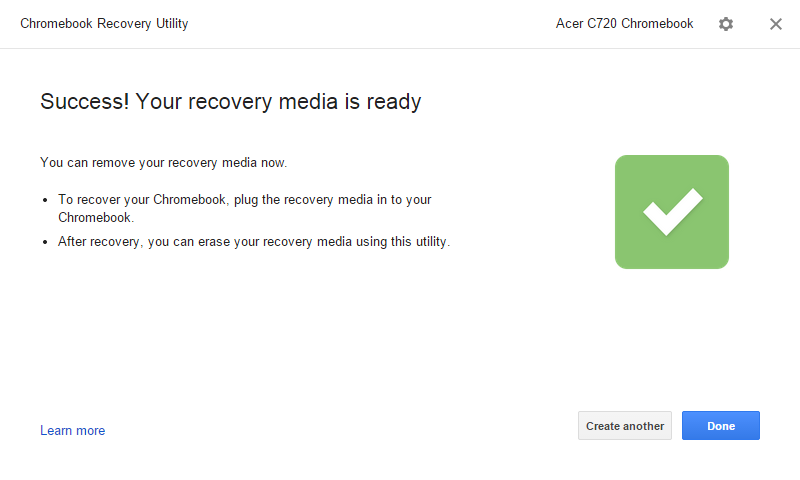
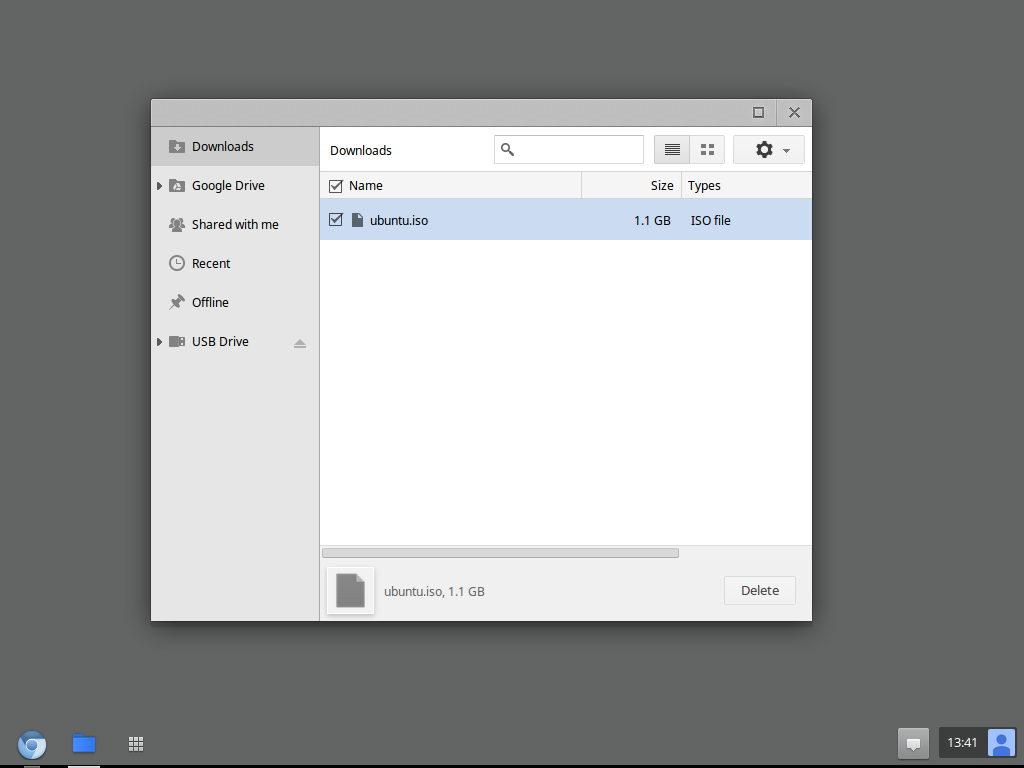
    Presuming that you have followed the installation guide to this point, you should have your chosen copy of Ubuntu downloaded to your chromebook. Before continuing, plug in the USB stick or SD card you wish to use as the USB installation media

    1. Navigate to Apps and then Files
    2. Highlight your downloaded distribution and right click on it, choose the rename option
    3. You will notice the file name change to blue to indicate it is being edited, type "ubuntu" without the quotes and press enter
    4. Open the chrome shell by pressing and holding Ctrl + Alt + t
    5. Type shell and press return
    6. Type sudo su and press return
    7. When prompted for the password, hit enter and press return
    8. Type the following command find / -name 'ubuntu.iso'
    9. You should see a few results, it's likely the one you want is /home/chronos/user/Downloads/ubuntu.iso however if yours is different write the path down
    10. The next step is to find out what the physical address of the USB disk you will be using as the installation media. Type fdisk -l and press return
    11. You should have several drives listed in your terminal. The important information to take note of is the Device Boot field. Under this you should see information like /dev/sda1
    12. /dev/sda1 is the Chromebooks built in solid state drive, ignore this and look for one such as /dev/sdb1, It should have the system labelled as W95 FAT32. This indicates that it is your memory card, although it may also be of type ntfs-3g
    13. Take note of the Device that is your memory card, you will need this for the next step
    14. Caution, be extremely careful with this command, do not get it wrong The command is a composite of the values you recorded in step 9 and 12 the command is "dd if=step9FilePath of=step12FilePath" without the quotes therefore using the examples above the command would be dd if=/home/chronos/user/Downloads/ubuntu.iso of=/dev/sdb1
    15. The command will not appear to have done anything if it is working, it takes a while and there is no progress indicator. When it is done it will tell you it has copied the files

    Recovery Guide

    1. First, if not done already, enable recovery mode
    2. Now that you're sitting at the "Chrome OS is missing or damaged" screen you need to pop your recovery disk that you made using the recovery disk preparation section of this guide into the chromebook
    3. Chrome OS will automatically install

    Sunday 24 August 2014

    Evolus Pencil UI Mockup Tool - Metro Icon Pack

    Recently I've discovered the Pencil project for designing and mocking up GUI interfaces.I've found that it is quite excellent for mocking up interfaces and it's also multi-platform.

    Sadly though it's a little lacking in the Icon department out of the box. I recently discovered the excellent Modern UI Icons project created by Austin Andrews. As Pencil uses SVG (scalable Vector Graphics) for it's controls and the Modern Metro UI icons back also uses SVG, I decided to convert the Modern Metro UI icons pack into something that Pencil can understand.

    There are over 1000 metro like icons in the modern metro ui icon pack and it is licensed under a fairly nice cc based license. You can download the pencil icon pack here

    Tuesday 27 May 2014

    WPF Dynamic Controls

    Well recently, actually specifically today I've had a requirement for the ability to dynamically add controls to a Window in a wpf project. The first thing I did naturally was to google the problem, I figure there's no point reinventing the wheel and all that, but it turns out there aren't any hard and fast guides to achieve the ability to dynamically add custom controls to a wpf project.

    Anyway I decided to rectify this by creating a ListView in my WPF Window, and settings its item source to a collection of custom controls, it turns out this worked exactly as I hoped.

    The Window with no dynamic controls added to it looks as below
    Window with no dynamic controls added


    And it looks like this with a couple of custom controls added to it


    To achieve this I created a UserControl xaml form called DynamicControl, added a Label, ComboBox and TextBox as the base control to be added to the ListView, the XAML markup for this is below.
     <UserControl x:Class="DynamicControlTest.DynamicControl"  
            xmlns="http://schemas.microsoft.com/winfx/2006/xaml/presentation"  
            xmlns:x="http://schemas.microsoft.com/winfx/2006/xaml"  
            xmlns:mc="http://schemas.openxmlformats.org/markup-compatibility/2006"   
            xmlns:d="http://schemas.microsoft.com/expression/blend/2008"   
            mc:Ignorable="d" >  
       <Grid>  
         <Label Content="Label" HorizontalAlignment="Left" VerticalAlignment="Top" RenderTransformOrigin="-0.132,0"/>  
         <ComboBox HorizontalAlignment="Left" Margin="43,0,0,0" VerticalAlignment="Top" Width="77" Height="26"/>  
         <TextBox HorizontalAlignment="Left" Height="26" Margin="135,0,0,0" TextWrapping="Wrap" Text="TextBox" VerticalAlignment="Top" Width="120"/>  
       </Grid>  
     </UserControl>  
    

    The XAML markup for the MainWindow view is very simple, it contains two buttons and a ListView, I've styled the ListView to have no borders and to hide the column headers to make it appear as if the dynamic controls are being added directly onto the Window as opposed to a control in the Window.

    The xaml markup for MainWindow.xaml is below
     <Window  
         xmlns="http://schemas.microsoft.com/winfx/2006/xaml/presentation"  
         xmlns:x="http://schemas.microsoft.com/winfx/2006/xaml"  
         xmlns:local="clr-namespace:DynamicControlTest" x:Class="DynamicControlTest.MainWindow"  
         Title="MainWindow" Height="350" Width="525">  
       <Grid>  
         <ListView Name="listView" HorizontalAlignment="Stretch" Margin="10,35,10,10" VerticalAlignment="Stretch" BorderThickness="0" >  
           <ListView.Resources>  
             <Style x:Key="lvheaders" TargetType="{x:Type GridViewColumnHeader}">  
               <Setter Property="Visibility" Value="Collapsed" />  
             </Style>  
           </ListView.Resources>  
           <ListView.View>  
             <GridView AllowsColumnReorder="False" ColumnHeaderContainerStyle="{StaticResource lvheaders}">  
               <GridViewColumn/>  
             </GridView>  
           </ListView.View>  
         </ListView>  
         <Button Click="Button_Click" Content="Add Control" HorizontalAlignment="Left" Margin="10,10,0,0" VerticalAlignment="Top" Width="75"/>  
         <Button Click="Button_Click_1" Content="Remove Control" HorizontalAlignment="Left" Margin="407,10,0,0" VerticalAlignment="Top" Width="100"/>  
       </Grid>  
     </Window>  
    

    And finally the code behind that allows a user to add or remove items/controls dynamically to the window
     using System.Collections.ObjectModel;  
     using System.Windows;  
     namespace DynamicControlTest  
     {  
       /// <summary>  
       /// Interaction logic for MainWindow.xaml  
       /// </summary>  
       public partial class MainWindow : Window  
       {  
         ObservableCollection<DynamicControl> dynamicControls = new ObservableCollection<DynamicControl>();  
         public MainWindow()  
         {  
           InitializeComponent();  
           listView.ItemsSource = dynamicControls;  
         }  
         private void Button_Click(object sender, RoutedEventArgs e)  
         {  
           dynamicControls.Add(new DynamicControl());  
         }  
         private void Button_Click_1(object sender, RoutedEventArgs e)  
         {  
           DynamicControl[] dca = new DynamicControl[listView.SelectedItems.Count];  
           listView.SelectedItems.CopyTo(dca,0);  
           if(dca != null && dca.Length > 0)  
           {  
             for (int i = 0; i < dca.Length; i++)  
             {  
               dynamicControls.Remove((DynamicControl)dca[i]);  
             }  
           }  
         }  
       }  
     }  
    

    And that's all there is too it. As you can see I create an ObservableCollection called dynamicControls that stores objects of the type DynamicControl. I set the ListViews ItemsSource to this ObservableCollection so that the view can track changes and reflect these on the interface. When you add a new control all you need to do is add a new DynamicControl item to the dynamicControls ObservableCollection.
    I do very much the same to remove items, but as I wish to allow multiple items to be selected I create a DynamicControl array, copy the contents of the ObservableCollection to it, then I iterate over the array and call the ObservableCollection Remove function to remove each selected DynamicControl from the ObservableCollection. Hopefully this will help you in creating your own Dynamic Control lists.